
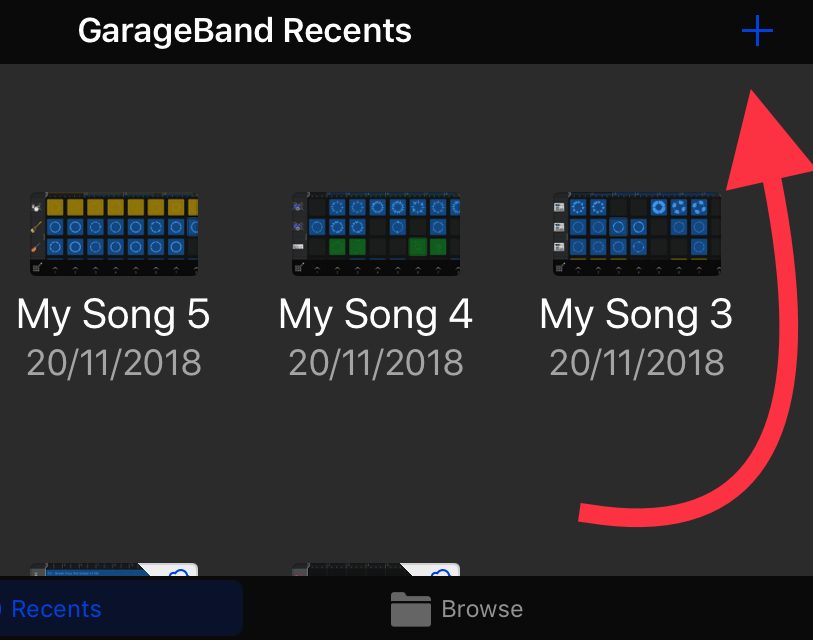
1. Click on + at top right in GarageBand Recents screen to begin a new recording
2. Choose Tracks tab along the top
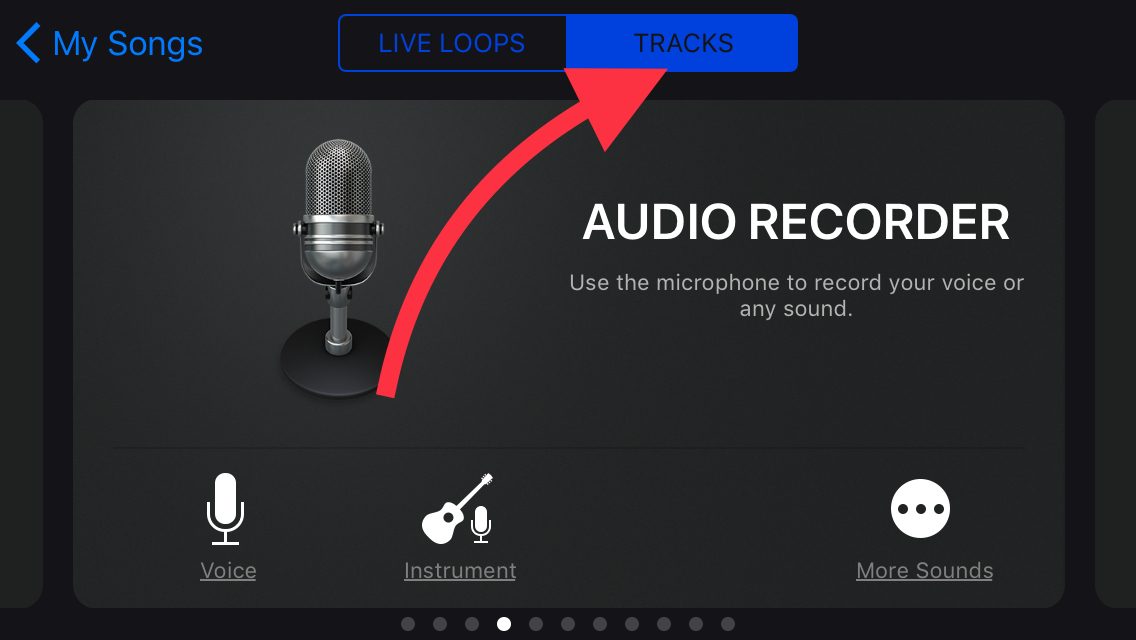
3. Slide from the screen left to right until you see Audio Recorder choice
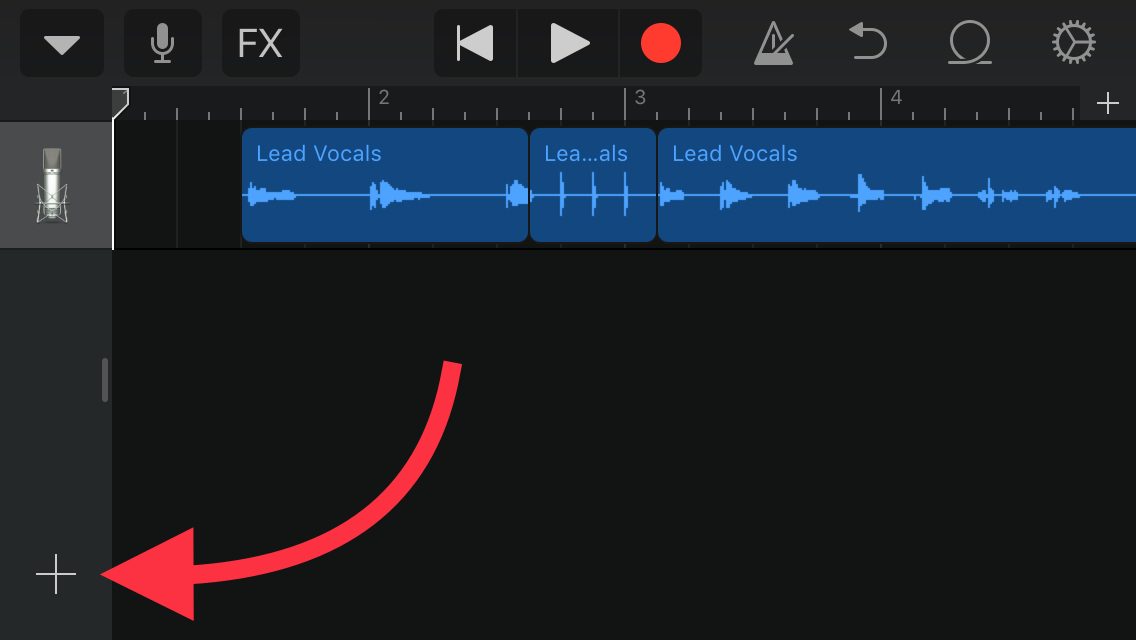
4. Now click click on + at top right 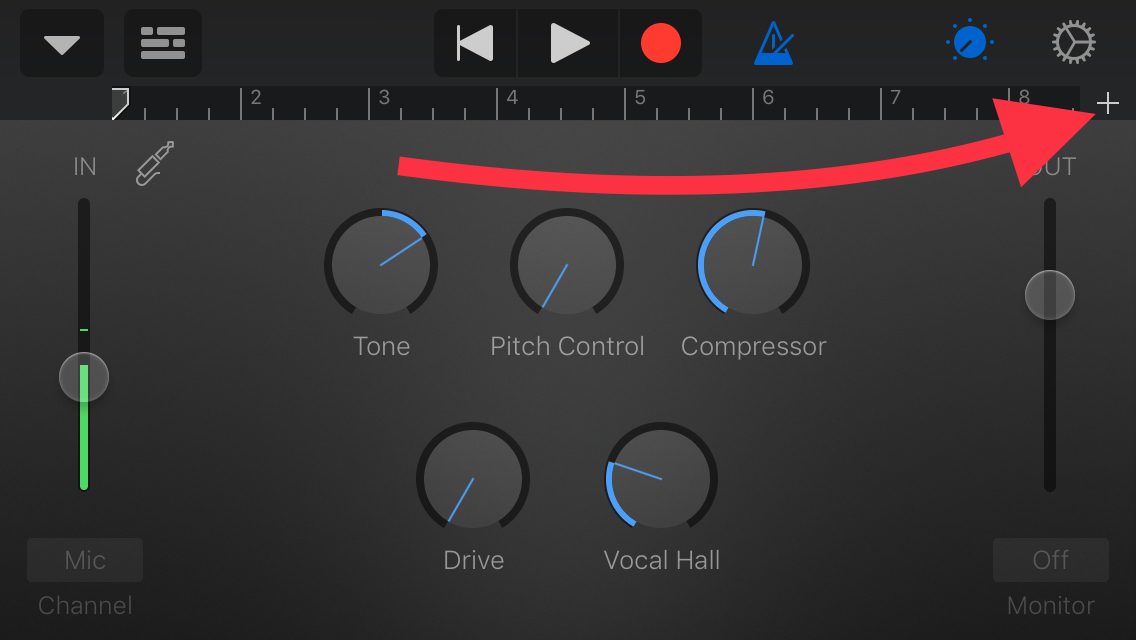
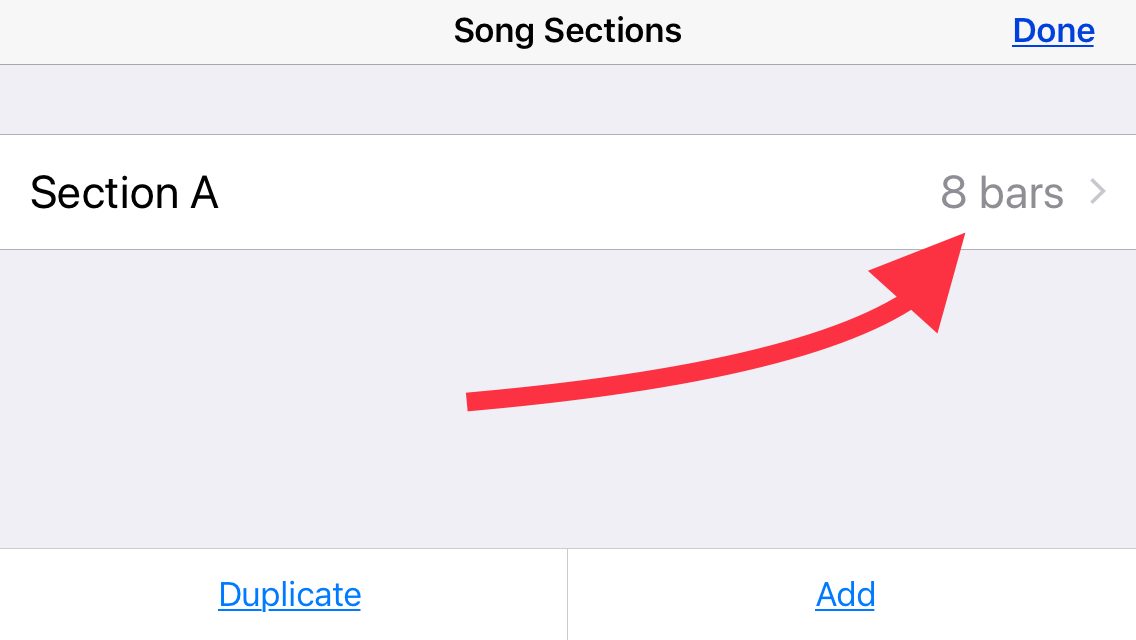
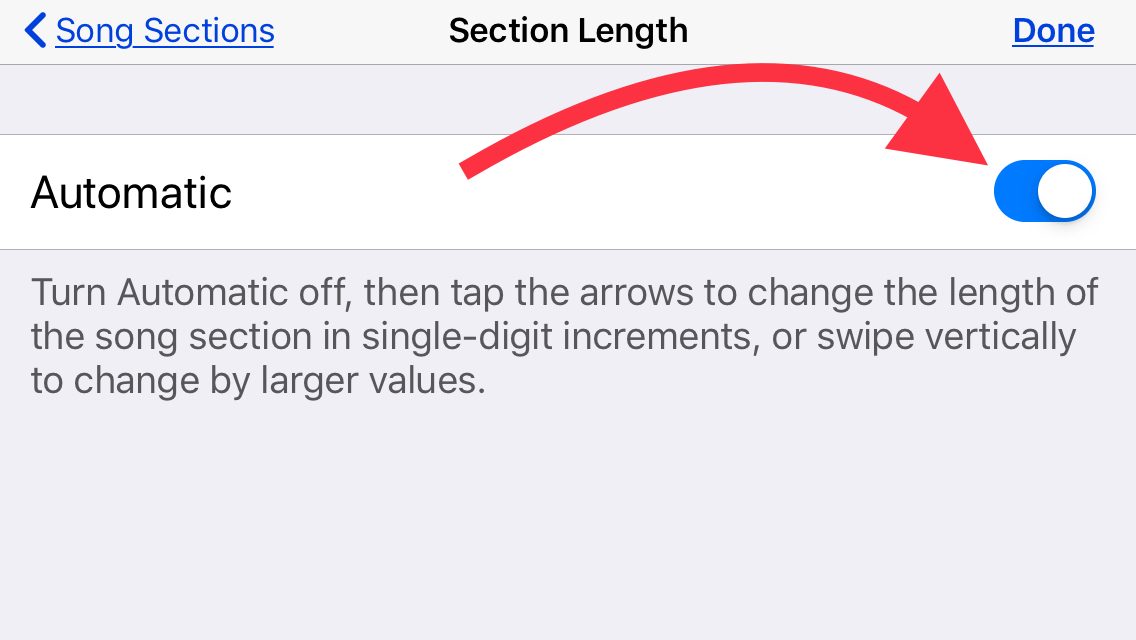
5. On the next screen click to the right of Section A where it says 8 bars to change to automatic by changing the slider to show on position for automatic
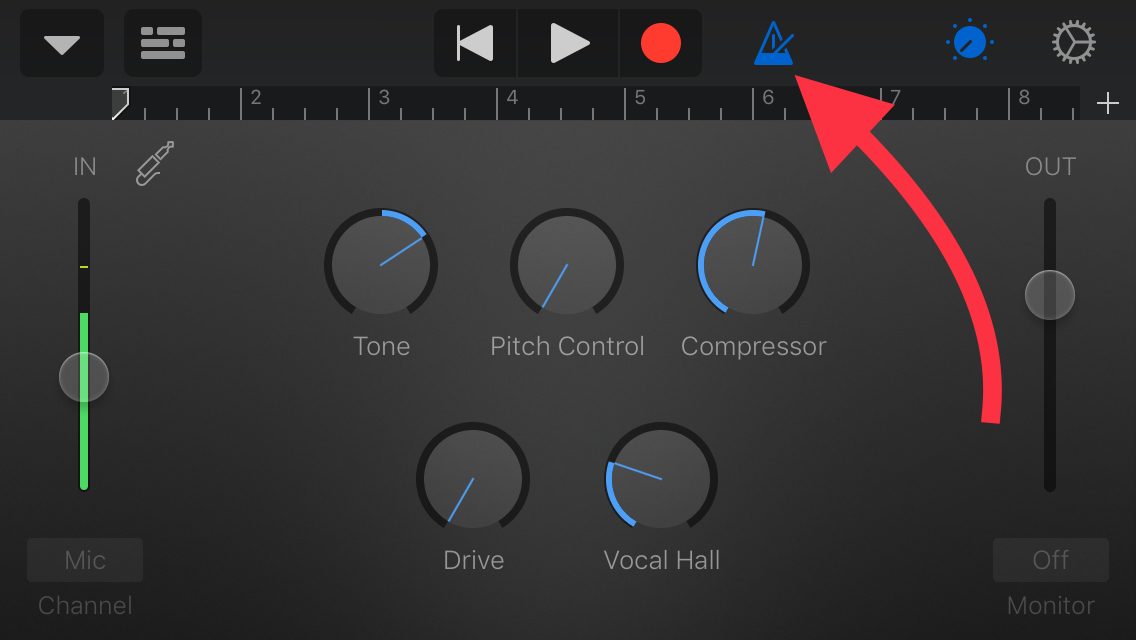
6. Switch off metronome icon so it does not show blue
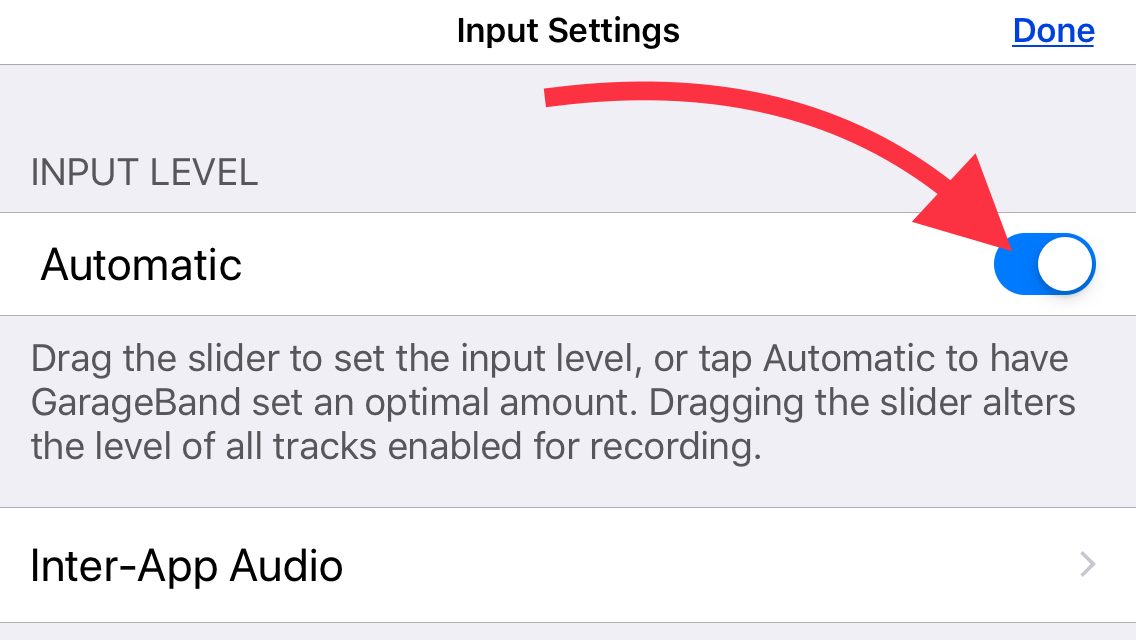
7. Click on the input settings icon to the left beside the word “IN” and slide the button to the right beside the word “Automatic” to switch this on
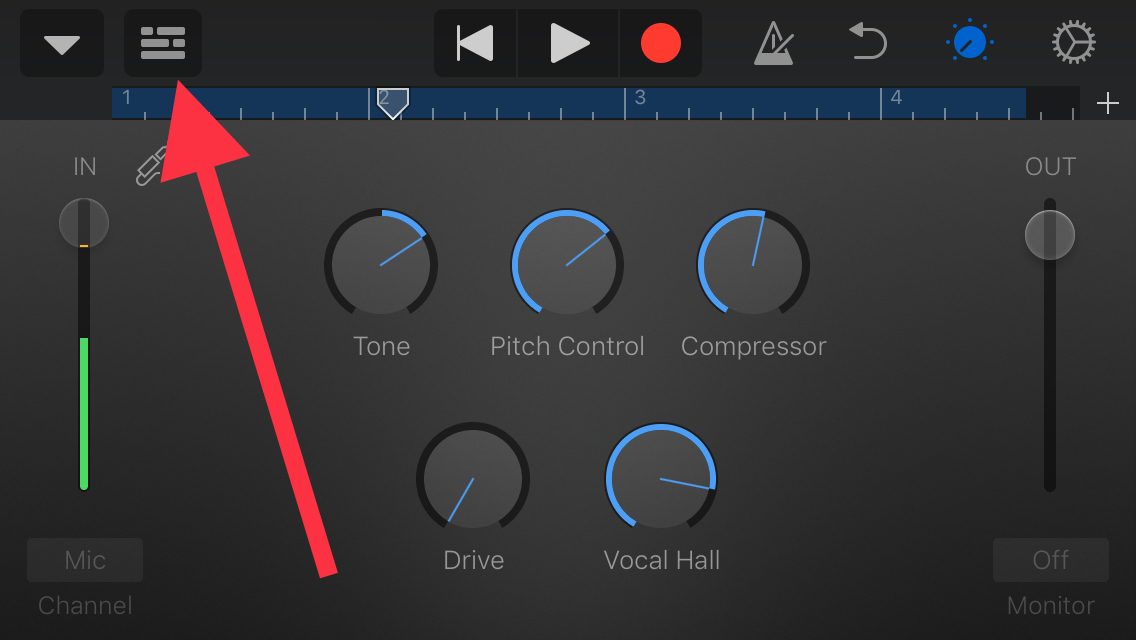
8. Switch the view to show the tracks by clicking on the icon to the top left next to the down arrow
9. Then click record red button, wait for the audible clicking and on-screen countdown before speaking.

10. Once you have finished speaking, press the white square stop button to halt the recording.
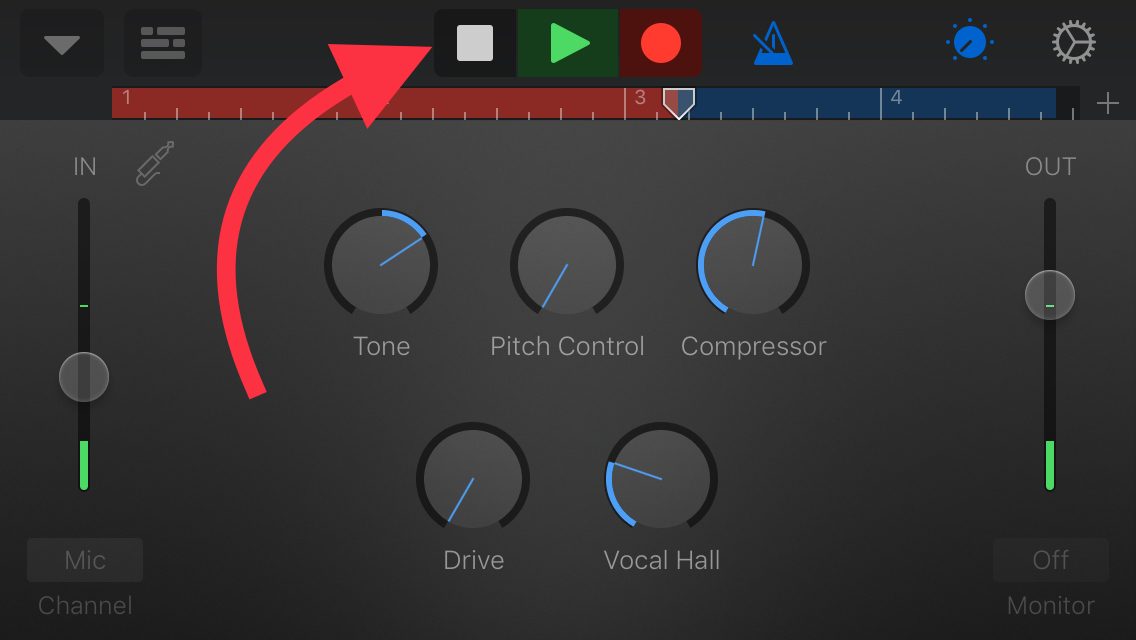
11. Press the white triangle play button to playback what you recorded.
12. Double-clicking on the blue audio track will reveal a range of choices for editing that recording, whether cut, copy, delete, loop, split, rename or (from the settings option) adjusting the speed or even reversing the recording.
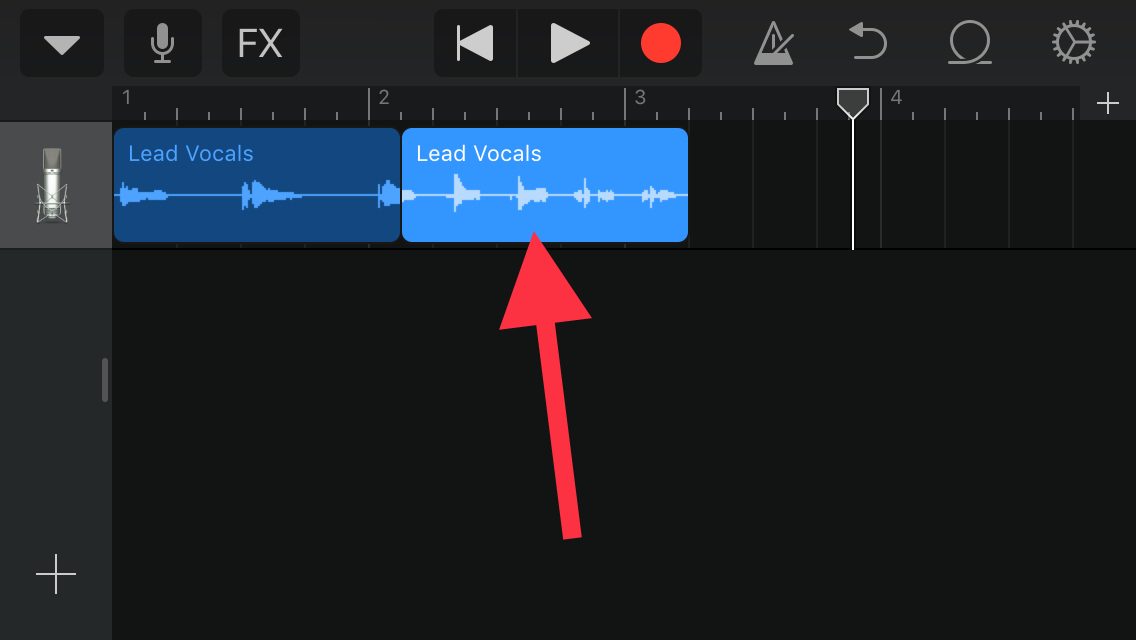
13. To edit out unwanted silence or noises between speaking double click the track, slide the timeline arrow above the track to before the unwanted sound, choose split from the menu when double-clicked on the track, and pull downwards on the scissors icon which will appear. Repeat this to split after the unwanted part of the recording, then double click this unwanted section and cut it or delete it.
14. Using this process you can cut and paste sections, phrases or individual words or sounds and move elements around.
15. Click and hold any track and choose to redo if wanted
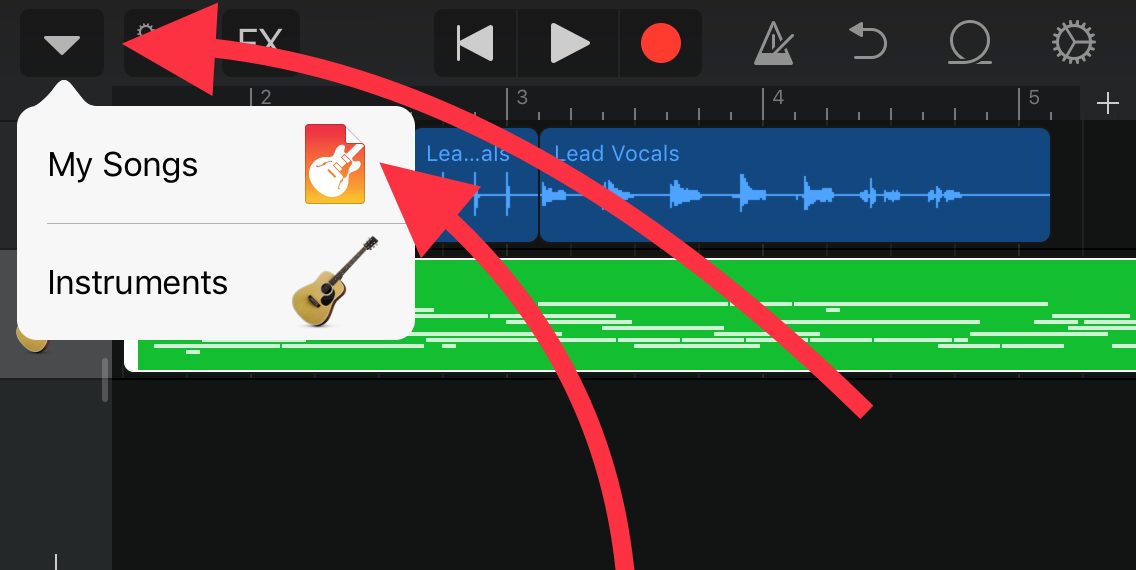
16. Once you’re happy with your recording then click on the downwards pointing arrow at the top left and choose “My Songs” to save this recording and return to the list of any other recordings

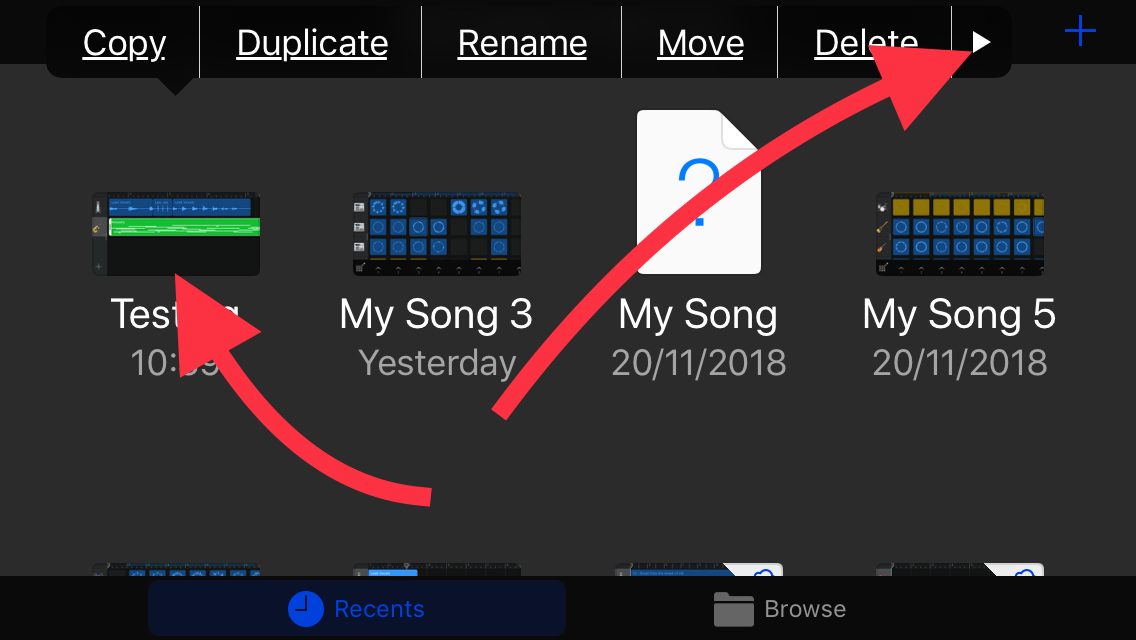
17. To name this recording simply hold your finger on the recording icon for the recording you’ve just made and choose rename from the menu, give it a new name and click done.
18. To share this recording elsewhere or with others then hold your finger on the recording icon for the recording you’ve just made and click on the sideways arrow until you see share as an option and click on that.
19. Choose “Song” so that this will convert the GarageBand file into an audio recording which can be played back by others without the need for the GarageBand app.
20. Select the level of quality you wish than click “share” so that you can then choose how you wish to share it, save to files if submitting to Canvas.
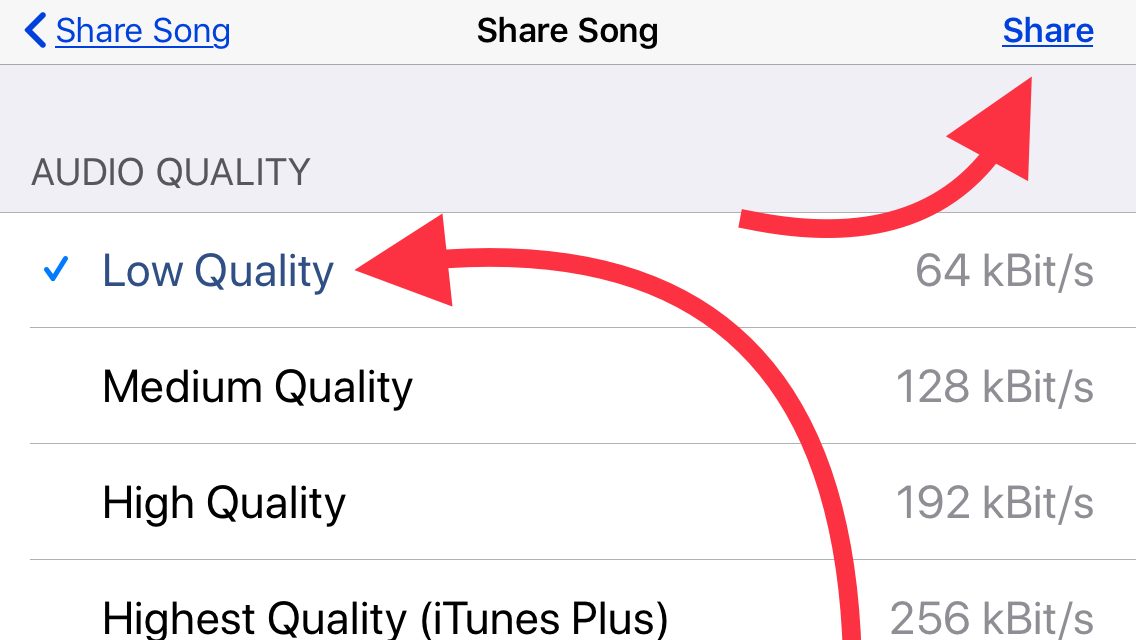
21. You can even save it to this iPad just into iPad Notes so you can keep it beside typed text without having to have an internet connection to share elsewhere – you can still share this note and the recording later elsewhere.

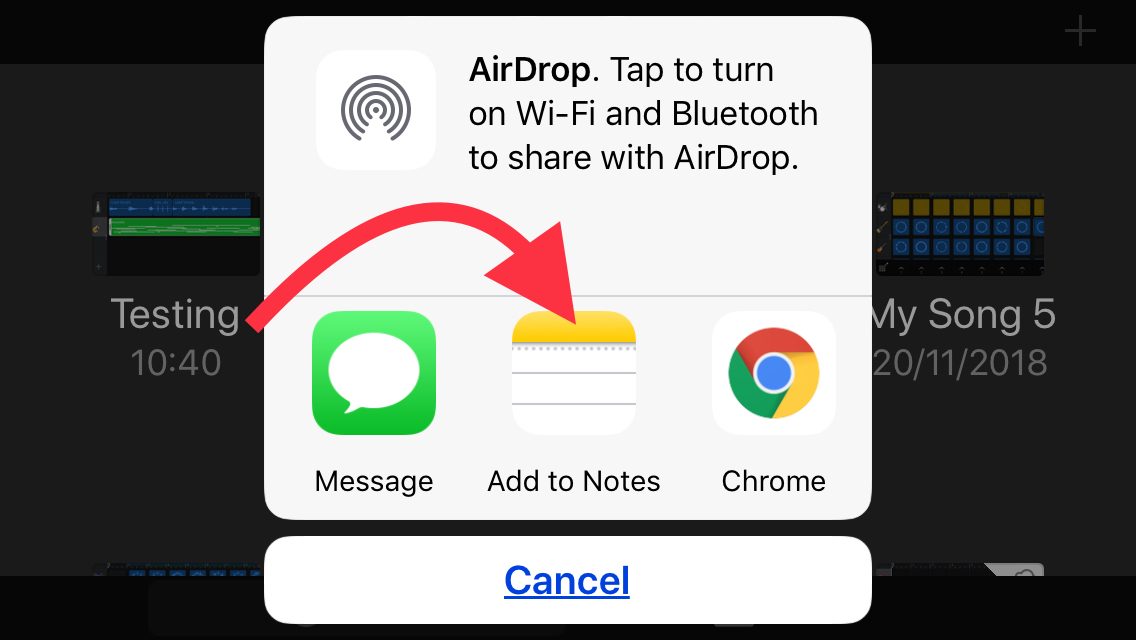
GarageBand has a host of inbuilt musical instruments available from which to choose to create a musical backing track to your audio recording of the spoken text. You don’t have to add this but it can add another dimension to the recording, especially if the recording is to be shared elsewhere. Also, as the musical background track is being added, the learner once more listens to the text to which the background track is added each time adjustments are made.
You don’t need to be able to play the chosen instrument, or know much about music, since GarageBand includes options for using neat auto-creation wizards. For this guide the steps will show how to add a guitar backing track.
 4. Slide from left to right until the guitar choice appears on screen
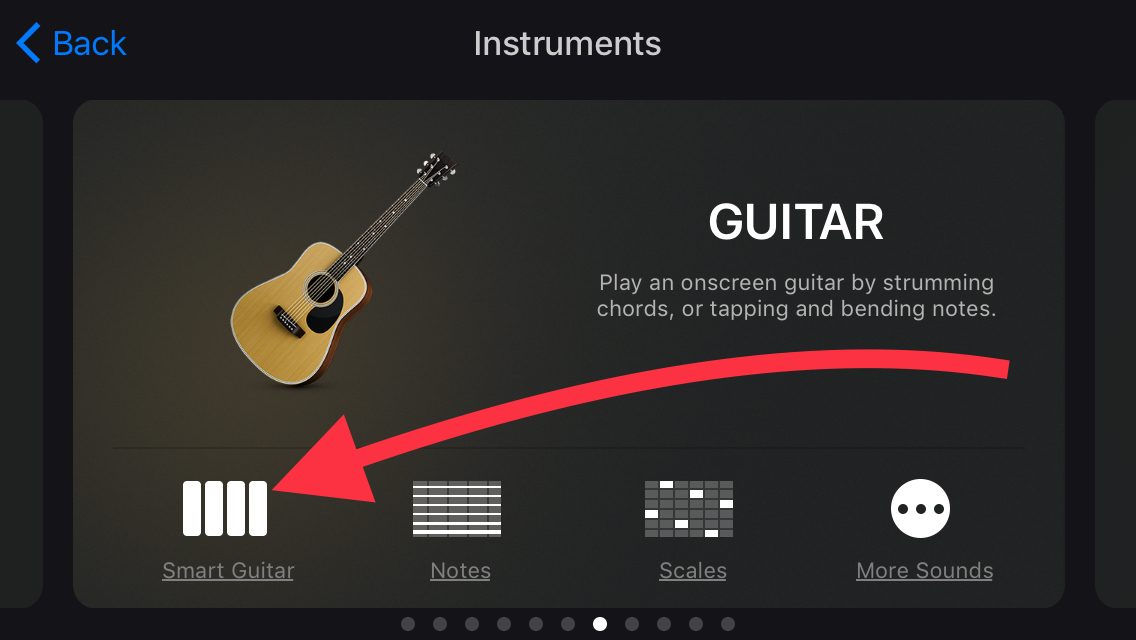 5. Click on “smart guitar” at the bottom left
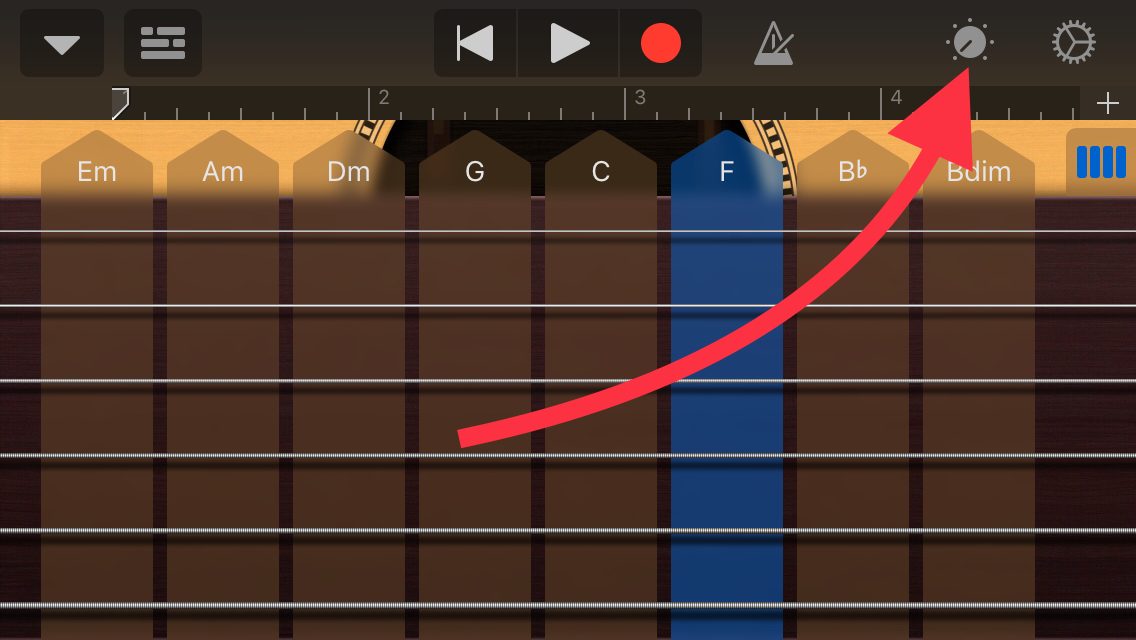
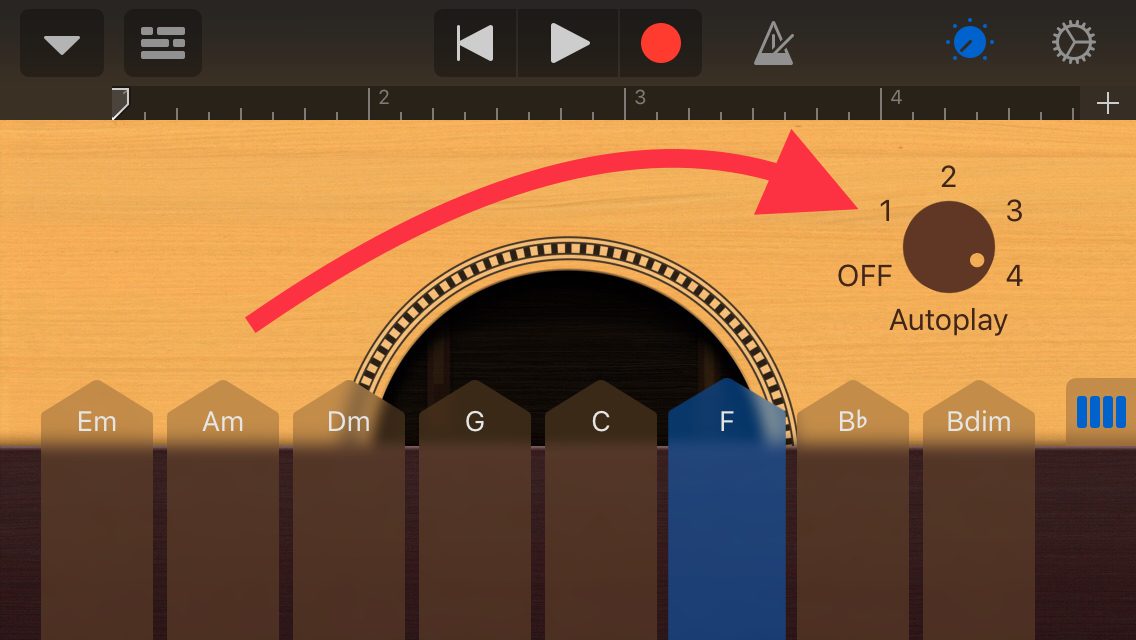
6. Now click on the icon which looks like a volume control dial at the top right
 7. Click on the “Autoplay” dial so that the choice dot aligns with number 4 (you can make a different choice as you wish).
 8. Try out creating music simply by clicking in turn on each chord to hear how it might sound. When you are ready to record the music simply click on the red record button, wait for the countdown, and then start playing your choice of chord buttons – note that you will hear the previously recorded audio recording of spoken text played back so that you will be able to match your guitar chords playing with this recording, and click on the white square stop icon to finish recording.
9. You can click on this guitar track to choose from the menus as to whether to delete and try again, or split and cut elements. You can adjust the relative volume of this track by sliding from the left and adjusting the volume control there.
10. Once ready to save and share this recording click on the downwards facing arrow at the top left
Click on the link below for a free online manual on the Apple support site which guides you through every aspect of using the GarageBand app on an iPad